Are you looking for the ideal computer screen recorder for yourself? If so, then you’ll be happy to know that you’re in the right place!
The ideal computer screen recorder is one that allows you to record your screen as easily as possible. When looking for a screen recorder for yourself, there are various factors that you must consider, such as features, user-friendliness, price, system requirements, and more!
Screen recorder software is essential for content creation as it allows you to record gameplays, video tutorials, webinars, and stuff to share with friends and family.
However, with the numerous screen recorders out there, it can be very difficult to identify which is the best one for the job. So in this article, we’ve handpicked the 3 best free and paid screen recorders for computers that you should definitely check out!
1. The Easiest Computer Screen Recorder – HitPaw Screen Recorder
When using a screen recorder desktop, the primary concern is how easy the screen recorder is to use. While using the HitPaw Screen Recorder, such concerns won’t be necessary!
HitPaw Screen Recorder is simple and easy-to-use software that allows you to record your screen as well as your webcam. It’s simple and highly intuitive user interface allows beginners to easily understand and use the software.
Users can choose from three different recording modes – record webcam, record screen, or Picture in Picture. Several people prefer the HitPaw Screen Recorder over other popular screen recorders, solely because of its user-friendliness.
To make it easier for you to judge the HitPaw Screen Recorder for yourself, we’ve listed all the features that you would notice while using the HitPaw Screen Recorder.
- The Picture in Picture recording mode allows you to record your webcam and screen simultaneously. This recording mode is used popularly for gameplay recordings.
- The HitPaw Screen Recorder allows you to record your screen with system audio, with microphone audio, or without audio.
- HitPaw Screen Recorders offers a cut tool that you can use to remove any unnecessary part of the video after recording.
- HitPaw also offers professional video editing software that you can use to make your videos more appealing.
Now, let’s understand how you can record your screen by using the HitPaw Screen Recorder.
- Download and install the HitPaw Screen Recorder on your computer.
- Launch the software and choose “Record Screen” from the home page.
- Now, you can either single-click to select a whole window for recording, or long-click to select a defined window.
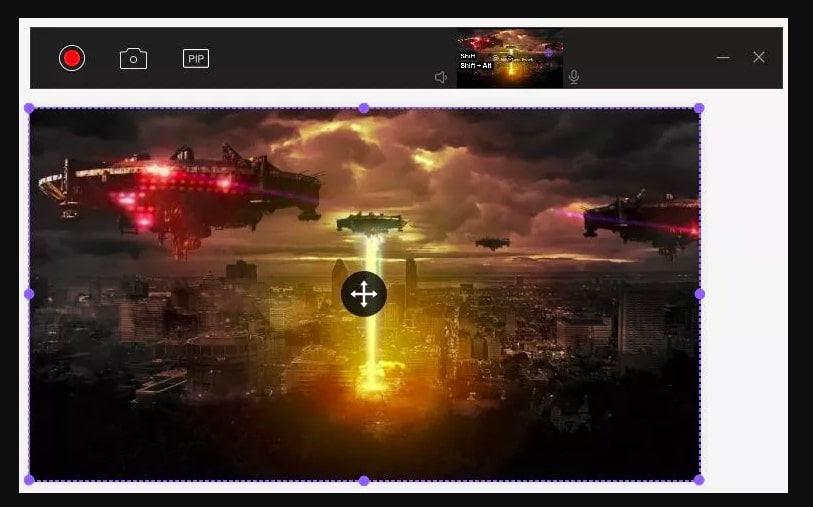
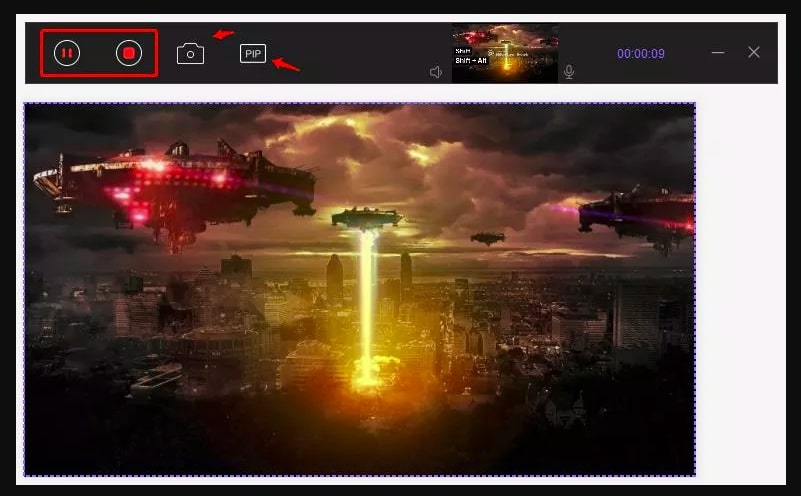
- Tap on the red record button to begin recording. During recording, you can use the option from the toolbar to pause the recording, take screenshots, or switch to Picture in Picture. Hit the stop button to end the recording.
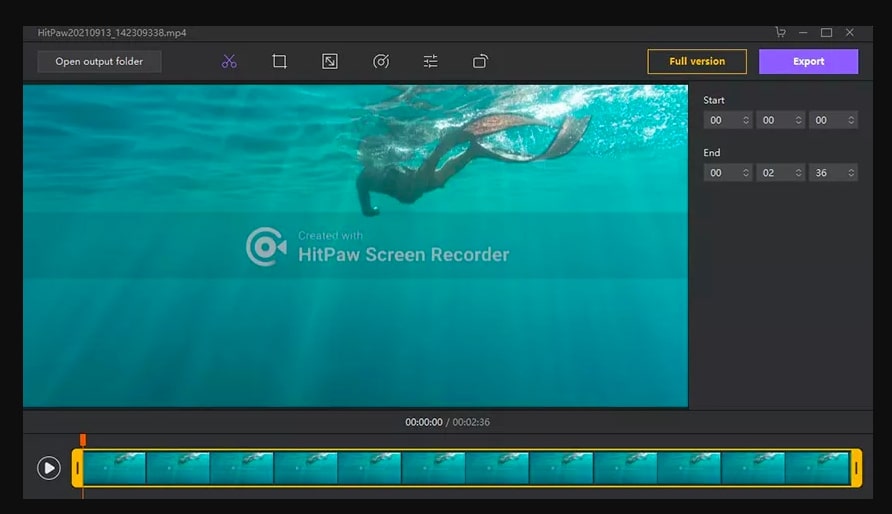
- From this next interface, you can cut your video to remove unnecessary portions. Select “Open output folder” to check out the video.
Pros:
- It is extremely easy to use due to its simple user interface.
- It offers video editing features to make your videos more interesting.
- It supports Hardware Acceleration to make the software run fast and smooth.
- Picture in Picture mode allows you to record your webcam and screen at the same time.
Cons:
- The trial version places watermarks on videos.
2. The Best Free Desktop Screen Recorder – Windows’ Built-in Game Bar
If you’re looking for a free computer screen recorder with no excessive features, then we’ve got the perfect tool for you! You can simply use the Xbox Game Bar to record your screen.
The Xbox Game Bar helps you record videos and take screenshots while playing PC games. The best part about using the Xbox Game Bar for recording your videos is that it is completely free to use.
Also, since it is pre-installed on all Windows 10 devices; therefore, you don’t need to download any software to use the tool.
Here are all the major features of the Xbox Game Bar.
- It allows users to capture their entire screen with just a single click.
- Users can take screenshots using the Xbox Game Bar.
- The Xbox Game Bar also allows you to broadcast your gameplay online with a single click.
Follow the steps below to record your screen using the Xbox Game Bar.
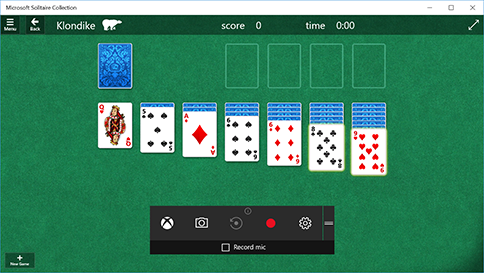
- Press the Windows + G keys from your keyboard to open the Xbox Game Bar.
- Select the red record button to begin recording your screen.
- Once done, hit the same button again to end the recording. After ending the recording will automatically be saved on your computer.
Pros:
- The Xbox Game Bar is completely free to use.
- It also lets you take screenshots at any moment.
- No software downloads are required; therefore, saving time.
- It is incredibly easy to use.
Cons:
- It does not offer video editing features.
- Only one recording mode is available.
3. The Most Professional Desktop Screen Recorder – OBS
If you’re in search of professional computer screen recorder software, then we recommend you to use OBS Studio. OBS Studio is one of the most professional and advanced screen recording tools out there.
Open Broadcaster Software or OBS Studio is open-source software that allows you to record your screen as well as your webcam. It is popularly known for the various features that it offers. You will certainly not be bored while using OBS Studio to record your screen.
Apart from screen recording, OBS Studio also supports streaming on various streaming platforms, such as YouTube Live, Twitch, and more! OBS isn’t just a screen recorder, but it also offers various video editing tools and features that you can use to make your videos much more appealing and interesting.
The professional interface that OBS Studio provides helps to make a professional work environment that you will certainly appreciate.
Most of the screen recording features that OBS provides are simple and easy to understand for professionals as well as beginners. The best part about OBS Studio is that it is completely free to use; therefore, making it the perfect screen recorder software for beginners.
Here is a list of some of the most important features of OBS Studio.
- OBS allows you to record your webcam, screen, or both at the same time. Users can select and customize a layout for the Picture in Picture effect.
- OBS offers various video editing features that you can utilize to make your videos more interesting.
- With OBS Studio, users can stream live on multiple streaming platforms, such as YouTube Live and Twitch.
- It allows you to adjust the volumes of microphone audio and system audio while recording your video.
Now that you know that OBS Studio is the right screen recording software for you, let’s take a look at how you can record your screen by using OBS Studio.
- First and foremost, you must download and install the OBS Studio from the official OBS website.
- After successfully installing OBS Studio, launch the software and you would come across a black screen interface accompanied with several options in the toolbar.

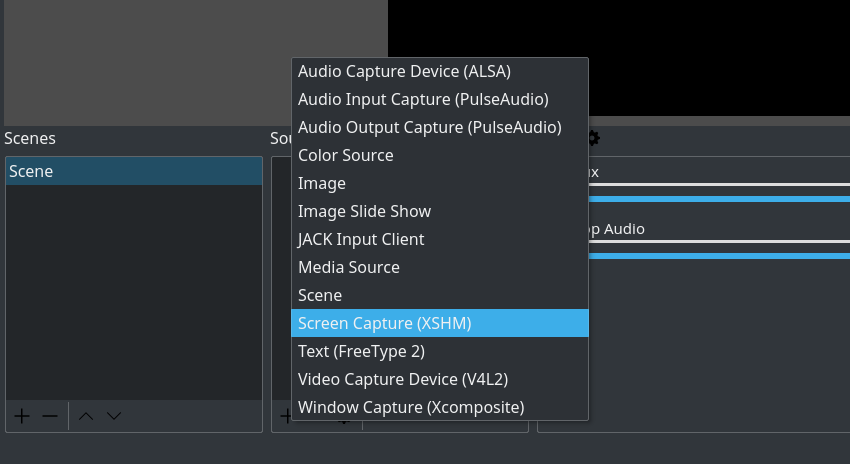
- Next, you need to select a source for the recording. Under the Source tab, tap on the “+” button and select “Display Capture”.
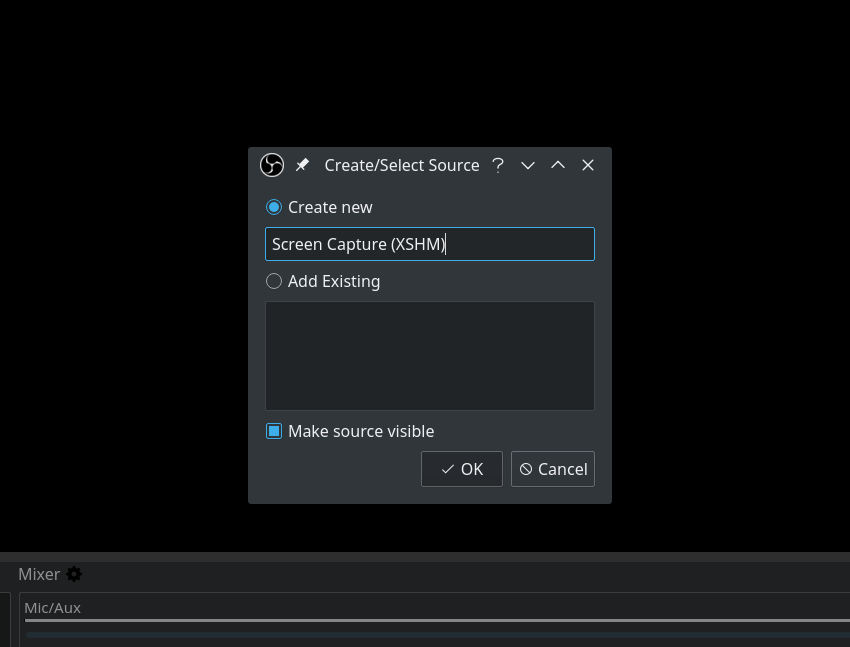
- From the pop-up window, hit “OK” to proceed.
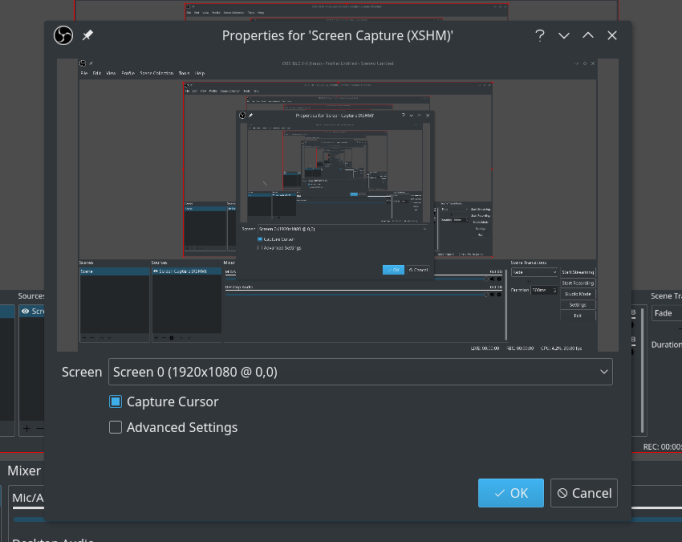
- Once again, hit “OK”.
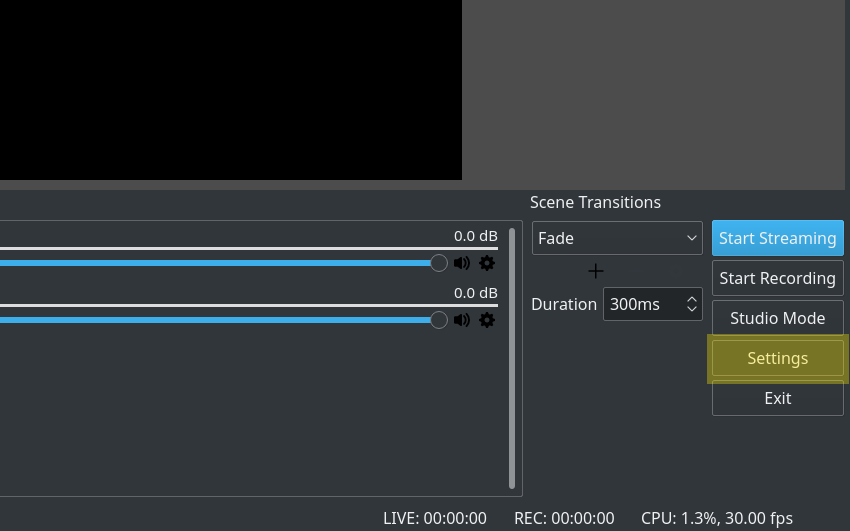
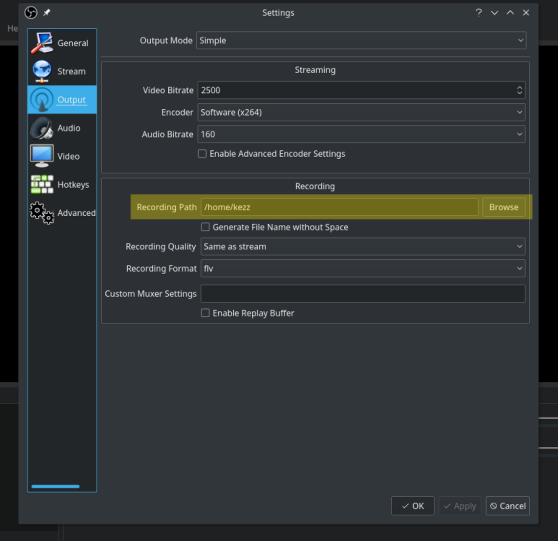
- Now, select “Settings” from the bottom right.
- Go to the “Output” tab and select the destination folder for the screen recording. After doing so, hit “Apply”.
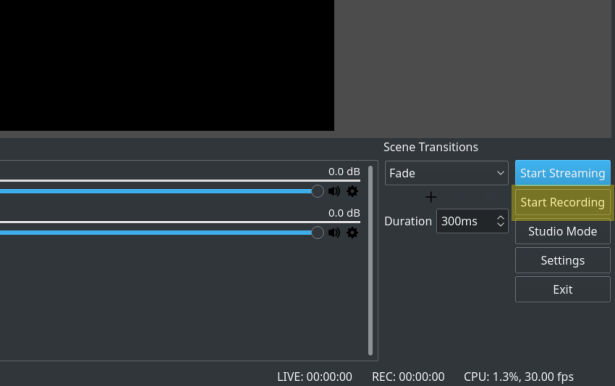
- Finally, you can start your screen recording by hitting “Start Recording” from the bottom right corner.
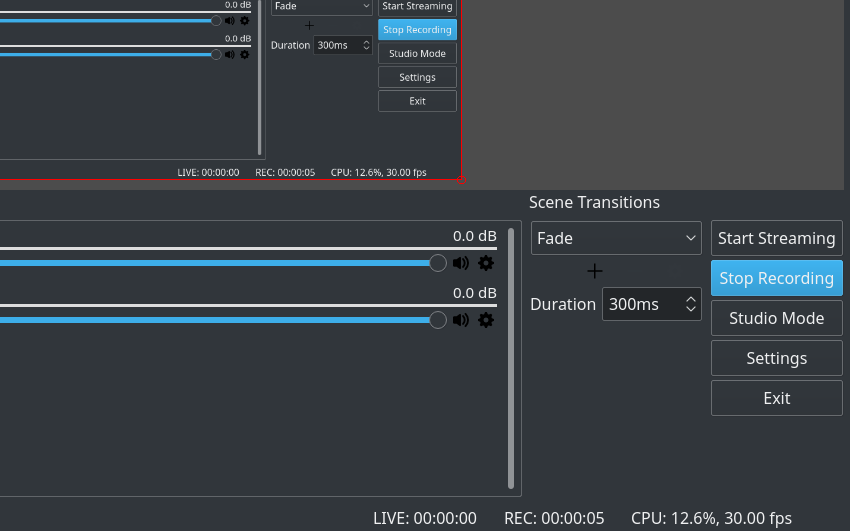
- Once your recording is complete, hit “Stop Recording” to end and save the video.
Pros:
- The software is completely free to use.
- Apart from recording, users can also stream live.
- It offers various video editing features.
- Its professional interface makes a convenient environment for users.
Cons:
- Some features offered by OBS are difficult to understand for beginners.
Final Words:
Those were the 3 best free and paid computer screen recorders that you must try! The tools and software mentioned in this article exceed other popular screen recorders in terms of features, user-friendliness, and popularity.
You will certainly not be disappointed while using these tools to record your screen.
